Running a website usually means juggling separate tools for content, team access, images, forms, databases and email.
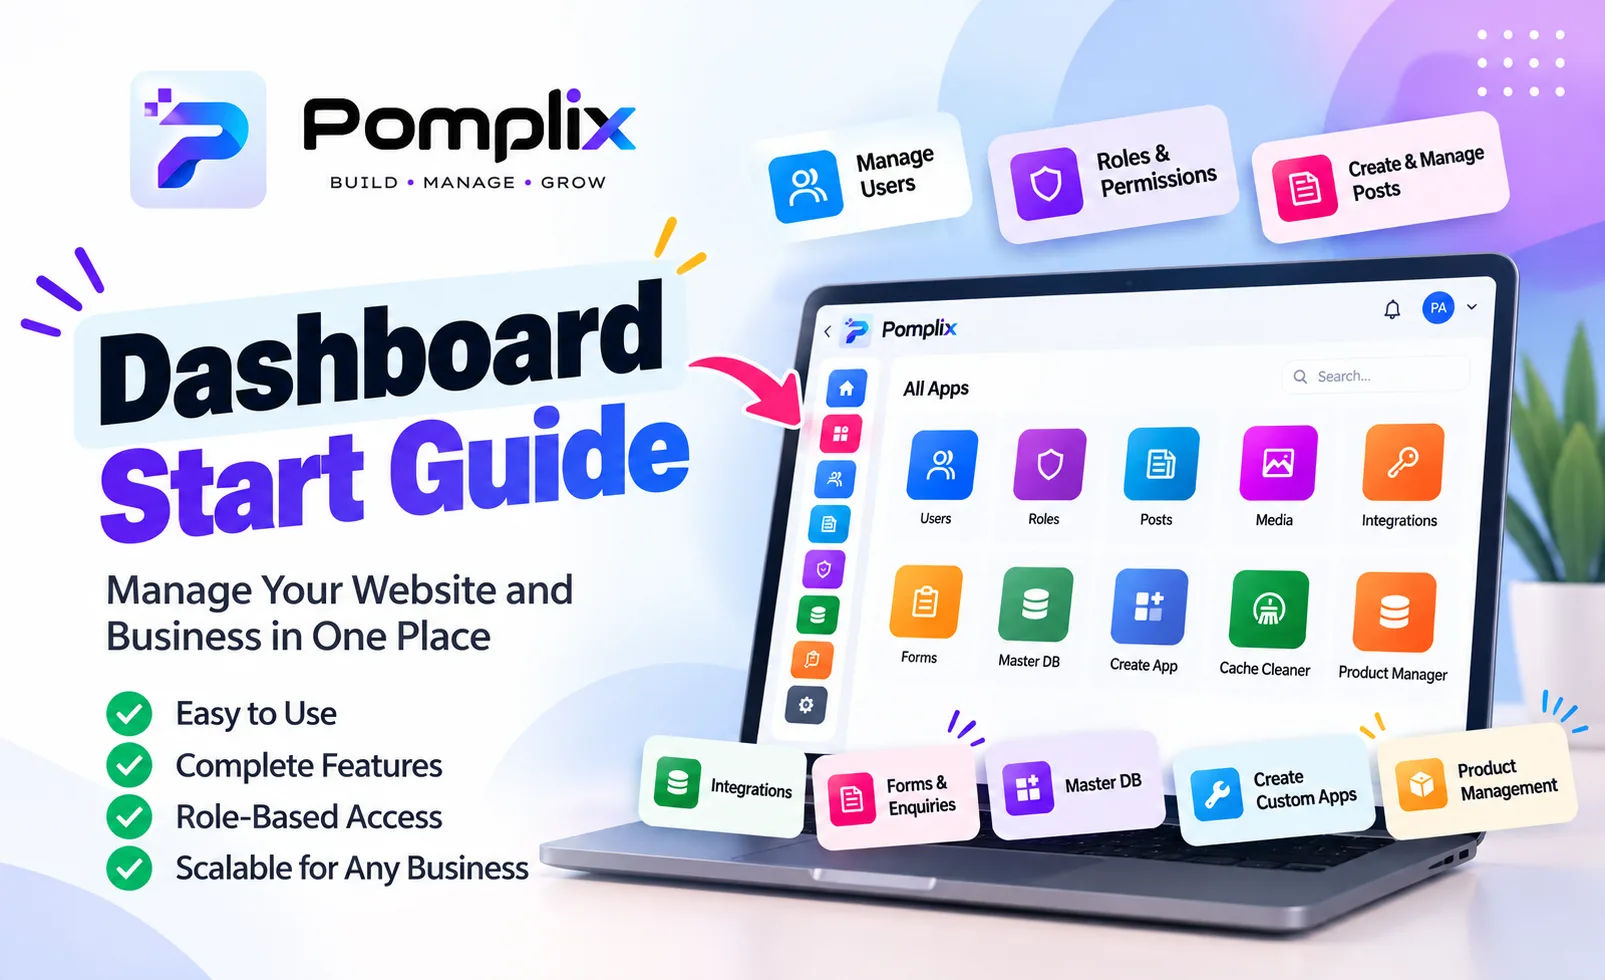
Pomplix Dashboard puts all of that in one workspace. Each client gets its own dashboard, made up of small applications (Posts, Media, Forms, Users and more) that you open from a single home screen.
This guide walks through every application in the dashboard, what it does and how the pieces fit together, so you can find your way around on day one.
What is Pomplix Dashboard?
Pomplix Dashboard is a workspace for managing a website and its business data without touching code or the database directly. Your team signs in, sees only the applications they have been given access to, and does their work there.
A workspace can include these applications:
Which applications you see depends on how your workspace was set up and on your own permissions. Start with the ones you need and add more later.
Getting started: the Launchpad
After you sign in and open your workspace, you land on the Launchpad. It shows every application you can use as a card, and you open one with a single click.
The dock gives you quick ways around:
Every app has its own link, and moving between apps is recorded in your browser history. The Back button takes you to the app you were just in, and you can bookmark or share a link straight to an application.
Users
The Users application is where you decide who gets into the workspace. It has two tabs:
Client admins can approve a request, choose which applications the person can use, change that access later, or revoke it. A revoked user goes back to the Requests tab instead of being deleted, so you can approve them again if needed. Both tabs have a search box for names and emails.
Three levels of access
For every application, a person gets one of three levels:
| Level | What the person can do |
|---|---|
| None | The application does not appear for them |
| View | They can open and read it, but not change anything |
| Edit | They can create, change and delete things in it |
Admins have access to every application. Only admins can approve requests and change permissions.
Roles
The Roles application lets admins define named roles, each with its own None, View or Edit level for every application. Instead of working out permissions from scratch each time, you describe a kind of person once, such as an editor who can change Posts and Media but only view Forms.
The default Admin role has Edit access to every application. It is a system role, so it cannot be renamed or deleted. Only admins can create, change or delete roles.
Why this matters: not everyone should be able to change integrations, manage users or delete content. Keeping access narrow means mistakes stay small as your team grows.
Taxonomies
Taxonomies organise your content. The application manages two things:
Categories you create here are what you pick from when you write a post, and the Posts list can be filtered by them.
Posts
Posts is where your content is written and published. Instead of one long text box, it uses a block editor: every paragraph, heading, image or table is its own block that you can move around.
Writing
Details, SEO and publishing
Each post has a details panel for the things that surround the writing:
A post moves through statuses: Draft, Review, Ready, Scheduled, Published and Archived. You can set a date and time to schedule a post. Scheduled posts are published by the editor once that time arrives while it is open (or the next time it is opened), so for a time-critical release, open the post around that time or publish it manually.
Finding posts
The Posts list has tabs for All, Published, Drafts and Archived. You can also search, filter by category or tag, and filter by date (updated, created, published or scheduled).
Working with a team
Media
Media is a shared library for the files your site uses. Upload once and reuse the file anywhere, for example as a post thumbnail or an image block.
With 500 articles on your site, a library you can search and filter beats hunting through old posts for the right picture.
Forms
The Forms application builds the forms your website needs: contact, enquiry, feedback, lead forms and so on. Each form is a list of fields you add and arrange.
Field types include short text, paragraph, number, email, phone number, date, time, image, image gallery, checkbox, multiple choice, dropdown and tags list. Fields can be required, can have placeholders, and can have default values.
From the dashboard you can:
The workflow is simple: create the form, add fields, publish, then read responses.
Master DB
Master DB is for structured business data that does not belong in a post. You create collections, such as Products, Events or Team Members, and define the fields each record has. The same field types as Forms are available, plus a few that only collections have:
Once a collection exists, you add, edit and delete its records in the dashboard through a card layout you can customise, with an icon for each collection.
Create App
Create App turns your collections into applications of their own. You give the app a name and choose which Master DB collections it should contain. It then appears on the Launchpad like any other application, and you control who can use it the same way as the built-in ones.
This is how a business can add the tools it needs, for example a Product Manager built on a Products collection with fields for name, price, category, images and availability, without anything being built into the dashboard.
Cache Cleaner
Fast websites keep copies of pages. After you change something, a visitor may still see the old copy until it is refreshed.
Cache Cleaner lets you refresh a page yourself. Enter the page path (or paste its full URL), and the dashboard asks your live site to clear that page. Your domain is added automatically. A superadmin sets that domain for the client under Clients.
Integrations
Integrations connect your workspace to the services behind it. Each integration is tested when you save it, and its secrets are encrypted and never shown again.
| Integration | What it is for |
|---|---|
| MongoDB | Your own database for posts, forms, users and Master DB data |
| Amazon S3 | File storage for the Media library |
| ImageKit | Image storage and delivery, as an alternative to S3 |
| Git | Records posts as commits in your GitHub repositories, which powers version history |
| Resend | Sends email from your workspace |
| Web Push (VAPID) | Browser push notifications under your workspace's own identity |
Only people with Edit access to Integrations can change these settings; others can see their status.
Push notifications
In the Web Push integration, enter a contact address and click Generate keys. The private key is created and kept on the server. Then, in Posts, each team member can click Notify me to turn on notifications on their device, and Send test to check that it works.
Notifications tell you about things such as a post being published or updated, someone asking to edit a post you are working on, or a problem sending content to Git. On iPhone and iPad, install the dashboard to your home screen first.
Typical workflow
A normal day might look like this:
Who is Pomplix Dashboard for?
Final thoughts
Pomplix Dashboard is more than a content manager. It brings your content, files, forms, team, structured data and connected services into one place, with access you control down to each application.
The biggest advantage is flexibility. Start with the applications you need today and add more as your business grows.
One workspace. Multiple business tools. Controlled access. Structured data. Scalable workflows.